


Sew a Roll Up Pencil Case: Your Easy DIY Tutorial
TL;DR
Creating your own roll-up pencil case is a simple and rewarding sewing project, perfect for beginners. The basic process involves layering a rectangular outer fabric, a lining fabric, and a smaller pocket piece. You then sew vertical lines on the pocket to create individual slots for pencils or pens. Finally, you attach a ribbon or fabric tie to one side, allowing you to roll it up and secure your art supplies on the go.
Gathering Your Materials and Tools
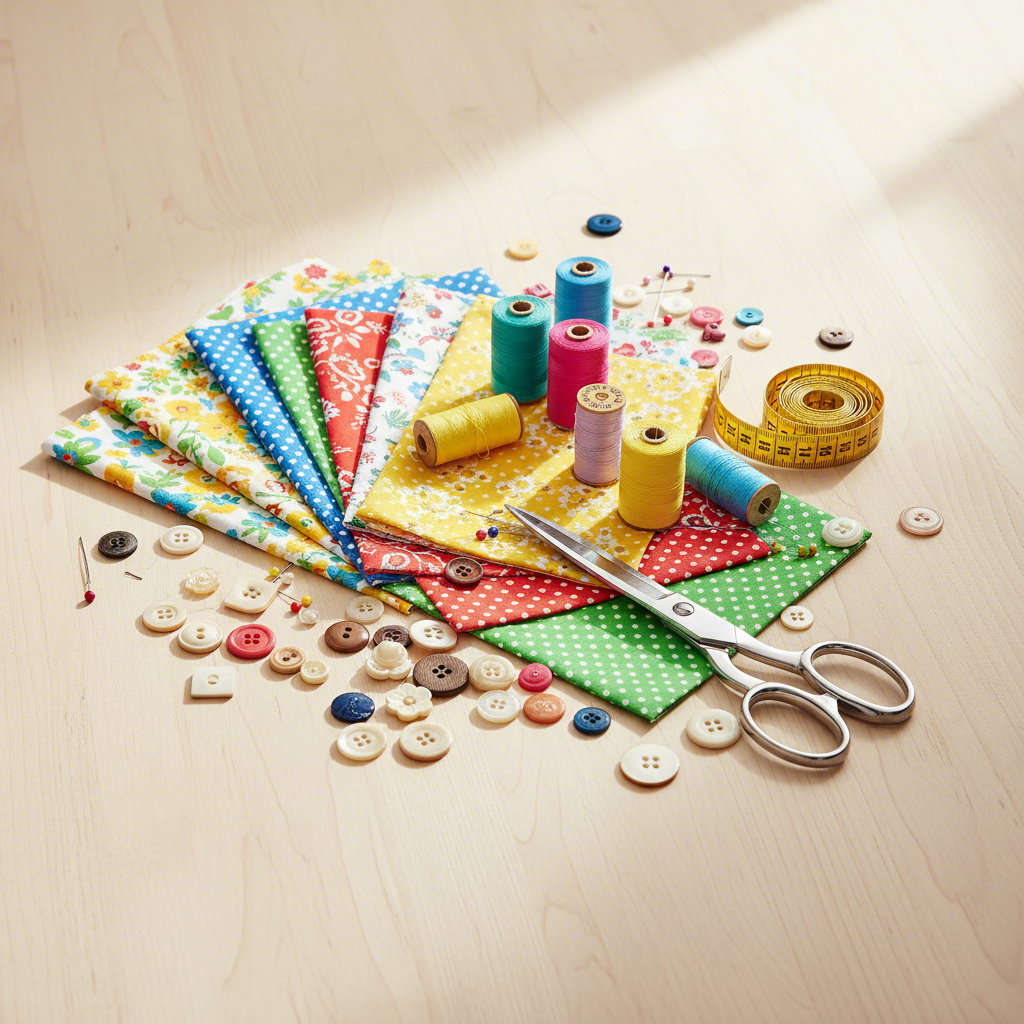
Before you start sewing, the first step is to gather all your necessary supplies. One of the best parts of this project is its versatility; it's an excellent way to use up fabric scraps you already have, making it both sustainable and budget-friendly. You don't need much to get started, just a few key items that are likely already in your crafting stash. The core components are fabric for the case body and pocket, thread, and a tie to keep it rolled up.
You have a lot of creative freedom when it comes to choosing materials. Most tutorials recommend medium-weight woven fabrics like cotton canvas, denim, or linen for the outer piece because of their durability. For the lining and pocket, you can use a lighter-weight cotton with a fun pattern to add a personal touch. For the tie, a simple ribbon, a piece of twill tape, or even a handmade fabric strap will work perfectly. If you're looking for a no-sew alternative for certain materials, some crafters opt for leather, which offers a different aesthetic and construction method.
While fabric cases are a popular DIY project, businesses looking for branded promotional items might consider professionally made alternatives. For instance, companies like Bincai International specialize in custom mesh pencil pouches that can be printed with a company logo, serving as excellent corporate gifts or student supplies. This can be a practical option for those needing items in bulk without the time for handmade creations.
To ensure your project goes smoothly, here is a checklist of the tools you'll need:
Sewing machine
Coordinating thread
Fabric scissors or a rotary cutter and mat
Straight pins or sewing clips
Ruler or measuring tape
Iron and ironing board
Fabric marker or chalk for marking lines
To help you decide on the primary material, here's a quick comparison between the classic fabric approach and a leather alternative, inspired by a popular Instructables guide.
| Feature | Fabric Case | Leather Case |
|---|---|---|
| Pros | Beginner-friendly, machine washable, endless color/pattern options, great for using scraps. | Highly durable, professional appearance, no-sew construction for slots (slits are cut). |
| Cons | Less rigid, may show wear more quickly depending on fabric choice. | Requires specialty tools (leather punch, exacto knife), not machine washable, less forgiving of mistakes. |
| Key Tools | Sewing machine, scissors, iron. | Rotary blade or exacto knife, leather hole punch, edge slicker (optional). |
Measuring and Cutting Your Fabric
With your materials selected, it's time to measure and cut. This project is wonderfully straightforward because it doesn't require a printed pattern—just a few simple rectangles. The dimensions can be easily adjusted to fit whatever you plan to carry, from standard colored pencils to longer paintbrushes or shorter crayons. Precision here is key, so take your time, measure twice, and cut once. Using a rotary cutter, ruler, and mat will give you the cleanest, straightest edges.
Different online tutorials suggest slightly different dimensions, which highlights the project's flexibility. For example, a guide from Create in the Chaos uses a main body of 15" x 10", while Helen's Closet Patterns suggests a larger 18.5" x 17" for a case with a protective top flap. For a standard case that holds about a dozen pens or pencils, the smaller dimensions work perfectly. A great tip for woven fabrics like linen or some cottons is to make a small snip and tear the fabric to get a perfectly straight line along the grain.
For this tutorial, we will follow a popular and easy-to-manage set of dimensions. Here are the pieces you will need to cut:
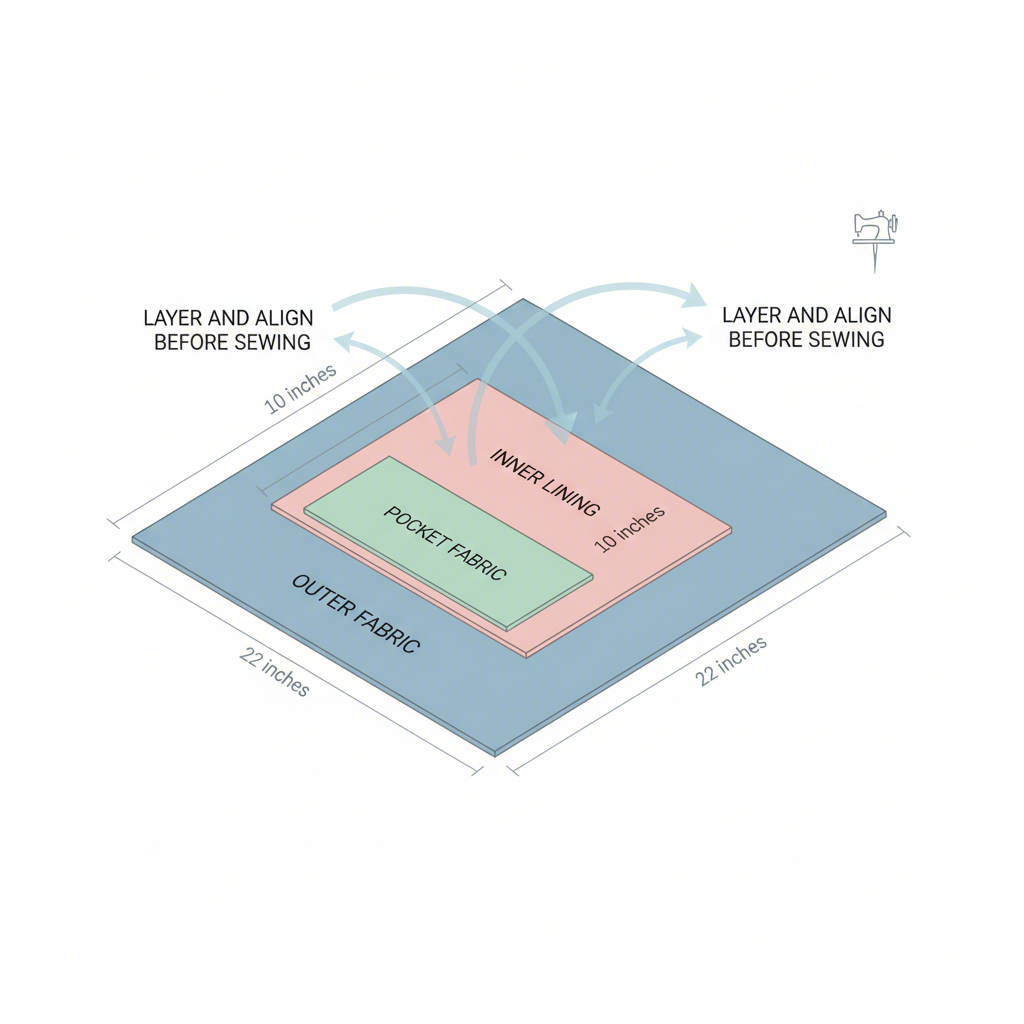
Outer Piece: Cut one rectangle measuring 15 inches by 8 inches. This will be the exterior of your case.
Inner/Lining Piece: Cut one rectangle measuring 15 inches by 8 inches. This will be the interior lining.
Pocket Piece: Cut one rectangle measuring 15 inches by 5 inches. This will be folded over and sewn to create the pencil slots.
Tie: You'll need about 20 inches of ribbon or cording. If making a fabric tie, cut a strip about 38 inches long and 1.5 inches wide.
If you want to create a larger case to hold more items, you can make a "double roll-up." As shown in a tutorial by This Pilgrim Life, you would simply increase the height of your main pieces (e.g., to 15" x 16") and cut two pocket pieces instead of one. This allows you to have two rows of pockets, doubling your storage capacity. Remember to iron your fabric pieces before cutting to remove any wrinkles and ensure your measurements are accurate.
Assembling and Sewing the Main Case
Now comes the fun part: bringing all the pieces together. This stage involves creating a "fabric sandwich," sewing the main body, and turning it right-side out for a clean, finished look. Before you start sewing the main perimeter, you'll want to prepare the pocket piece. Take your 15" x 5" pocket fabric and, along one of the long edges, fold the raw edge in towards the wrong side by about 3/8", pressing it with an iron. Fold it over again by another 3/8" to conceal the raw edge, press, and sew a straight stitch along this hemmed edge. This creates a neat, durable top for your pocket.
Next, lay your inner/lining fabric on your work surface with the right side facing up. Place your prepared pocket piece on top of it, aligning the bottom and side raw edges. The hemmed edge of the pocket should be toward the center of the lining piece. To keep it from shifting, you can baste the pocket to the lining by sewing a stitch very close to the edge around the sides and bottom. Now, take your 20-inch ribbon, fold it in half, and place the folded end on the middle of one of the short sides of your case, with the tails pointing inward. Pin it in place between the lining and where the outer fabric will be.
With the pocket and tie in position, place your outer fabric piece on top, right side facing down. You should now have a stack with the lining (right side up), the pocket, the tie, and the outer fabric (right side down). Pin all the layers together around the entire perimeter. This layered assembly is what ensures all your seams will be hidden on the inside of the finished project.
With everything pinned, you are ready to sew. Follow these steps for a professional finish:
Starting on one of the long sides, sew around the entire rectangle using a 1/4 to 1/2-inch seam allowance.
Remember to leave a 3-4 inch gap unsewn along one edge. This opening is crucial for turning the case right-side out.
Before turning, clip the four corners diagonally. This removes excess bulk and will help you achieve sharp, crisp corners.
Carefully turn the entire project right-side out through the gap you left. Use a pencil eraser or a corner-turning tool to gently poke out the corners so they are neat and square.
Press the entire case flat with an iron, paying special attention to the seams. Tuck the raw edges of the opening inward and press them to align with the sewn seam.
Finally, topstitch around the entire perimeter of the rectangle, about 1/8-inch from the edge. This step closes the turning gap and gives your pencil case a polished, professional look.
Creating the Pencil Slots
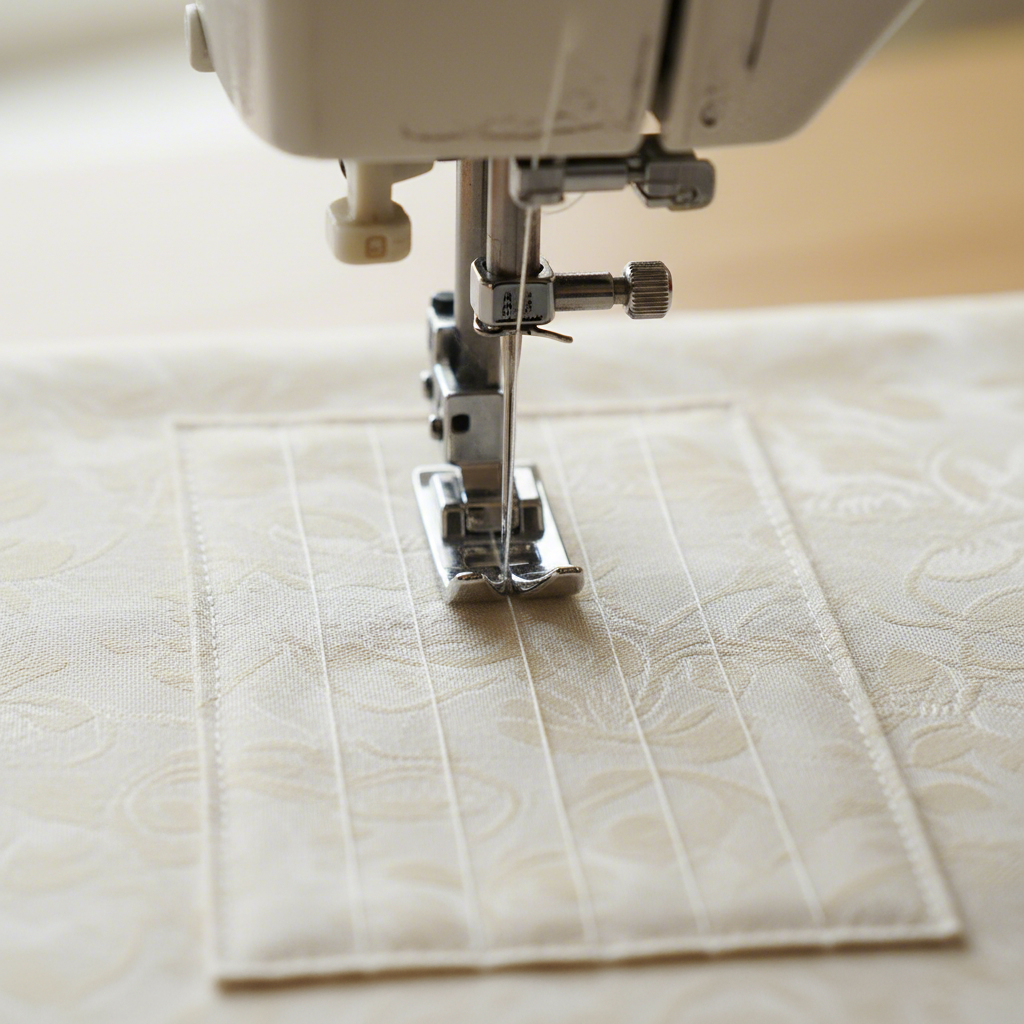
The final construction step is what transforms your fabric rectangle into a functional pencil case: sewing the vertical slots. This is where you'll create the individual pockets that hold each pencil, pen, or tool securely. Proper spacing is important to ensure your items fit snugly without being too tight or too loose. Before you start sewing, take a moment to plan the layout and mark your stitch lines for accuracy.
Using a ruler and a fabric marker or chalk (a Frixion pen, which disappears with heat, is a great option), draw straight vertical lines from the top hemmed edge of the pocket down to the bottom seam of the case. The distance between these lines will determine the width of each slot. The ideal spacing depends on what you intend to store. For standard colored pencils, a width of about 3/4 inch is common. For slightly thicker pens, like Flair pens, 1 inch is a good measurement. Some crafters suggest making the first and last slots slightly wider at 1.5 inches. Don't be afraid to customize; you can even vary the widths to accommodate different-sized tools, like a mix of paintbrushes and pencils.
Once your lines are marked, you're ready for the final stitches. To ensure your slots are strong and your case looks great, keep these tips in mind:
Secure Your Stitches: Always backstitch a few times at the beginning and end of each vertical line (especially at the top of the pocket) to reinforce the stitching, as this area will see the most stress.
Choose Your Thread Wisely: Use a thread color that matches your outer fabric, as these stitches will be visible on the back of the case. A coordinating color will create a clean, seamless look.
Start from the Bottom: Begin sewing each line at the bottom of the case and stitch upwards towards the top of the pocket. This helps prevent any puckering or bunching of the fabric.
Test the Fit: Before sewing all the lines, you can sew one or two and test the fit with one of your pencils or pens to make sure the spacing is just right.
After sewing all the vertical lines, your roll-up pencil case is complete! All that's left is to fill it with your favorite creative tools, roll it up, wrap the tie around, and enjoy your beautifully organized and portable art kit. This simple, handmade item is not only practical but also makes a thoughtful and personalized gift.
Frequently Asked Questions
1. What is the best fabric for a roll-up pencil case?
The best fabric combination is typically a durable, medium-weight fabric like cotton canvas, denim, or corduroy for the exterior to withstand wear and tear. For the interior lining and pocket, a standard quilting cotton is a great choice as it comes in countless colors and patterns, allowing for creative customization.
2. Can I make this without a sewing machine?
Yes, you can absolutely make a roll-up pencil case by hand. It will take more time, but using a simple backstitch for the main seams will create a strong and durable hold. For the vertical pocket lines, a straight running stitch will work well. Just be sure to keep your stitches small and consistent for the best result.
3. How can I customize the size of my pencil case?
Customizing the size is very easy. To make the case taller for longer items like paintbrushes, increase the shorter dimension of your rectangular pieces (the height). To make it wider to hold more items, increase the longer dimension (the width). Just remember to adjust the pocket and lining pieces to match the new dimensions of your outer piece.


 Send Email
 售前客服
售前客服